The ability to take a good photograph is a talent. There is a world of difference between the snaps we take for fun and those that have become part of the iconic photographic record of our progress as a civilization. Countless times, we have rediscovered that a picture really does speak a thousand words. But, even Michelangelo himself, a guy stuffed full of creative talent, made sure his tools and materials were the very latest technology. Thankfully, there are easier ways of keeping an image than spending hours on your back painting your living room ceiling. Before you release your inner Michelangelo and go all DSLR creative, read this useful information on modern digital single lens reflex cameras, the image capturing, and sharing the technology of the 21st century.
Aperture Priority and Shutter Priority Modes
If you are not confident about handling your DSLR camera manually with perfection, you can opt for semi-auto or semi-manual modes. Semi-manual modes are modes with Aperture Priority and Shutter Priority. Many professionals prefer Aperture Priority mode for their pro shoots.
In Aperture Priority mode, you choose to control the aperture manually and leave the control of shutter to the camera. Aperture controls the extent the lens is open restricting the amount of light entering. This mode helps capture well-exposed photographs.
In Shutter Priority mode, you choose to control the shutter speed manually and leave the control of aperture size to the camera. Shutter speed manages exposure time. It decides the time length the camera lens remains open to allow a sufficient amount of light for professional standard photographs. Usually, a longer shutter time is required for low light and a relatively shorter span in well-lit conditions.
Manipulating the Depth of Field
Aperture Priority mode allows you to manipulate the depth of field (DOF). You can achieve a shallow depth of field by setting the aperture to a larger size that is a smaller f-number on your camera. This allows you to take shots with a subject in focus but with the background blurred in contrast. Shallow depth of field is ideal for food photography and portrait shoots.
A deep depth of field can be achieved by selecting a small aperture size that is higher f-number on your camera. This will allow the camera lens to focus equally on the object and the background. Neither the object nor the background is out of focus making settings for deep depth of field ideal for landscape photography.
Manipulating the Motion of Object
Shutter Priority mode allows you to manipulate the motion of the moving object. With fast shutter speed, you can capture a moving object as a still image, referred to as freezing of image. A slow shutter speed lets you capture the movement of the object. With a slower shutter speed moving objects appear blurred whilst with a faster shutter speed they appear clear and vivid.
Making Use of a Camera Tripod
Capturing photos at night and in dim light requires steady handling of the camera. Even the slightest movement of your hand will result in blurred images. A good quality DSLR camera tripod will resolve this issue. With your camera stand firmly positioned, you don’t need to hold your camera and can capture vibrant, eye-catching images of fireworks or the beauty of skies at sunset.
Before investing in a specific camera tripod, be sure to pay attention to the speed of adjusting its ball head and the telescoping speed of the legs, or else you will have a hard time setting it up when you have no time to capture a moment. Similarly, it is important to consider the weight of your tripod. Sometimes, the weight is directly correlated to the durability of the tripod, but you should take your time to find what is sturdy but is still easy to carry around.
Speaking of durability, you may have to consider the material of your tripod here. You may opt for an aluminum tripod, which is quite affordable but can be on the heavier side. A carbon fiber DSLR camera tripod is usually a lighter option but be ready to cough up some good money.
Get a Shoulder Rig
If your main goal is to take DSLR video, you may definitely want to invest in one of the best DSLR shoulder rigs currently available in the market. It really has a huge impact on how people perceive you as a DSLR artist. Besides looking more professional, you will be able to shoot things without having to worry too much about stability. It really goes a long way in simplifying shooting things such as run and gun or b-roll shooting where it is important to be quick and mobile. You should also consider buying a shoulder rig if you don’t really like the idea of locking down your camera on a monopod or tripod.
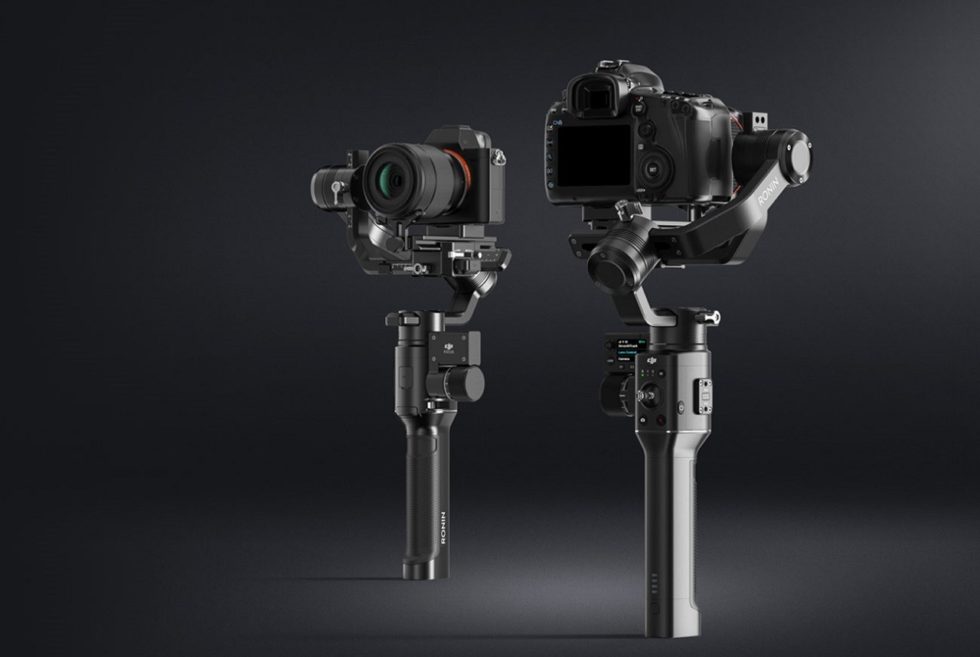
Go Get a DSLR Gimbal
Just like other tools and accessories, it really makes a difference to have DSLR camera gimbals and stabilizers handy. A gimbal is basically pivoted point that lets you rotate something along a single axis. What it means is that you give yourself a chance to take incredible photos from some interesting angles when you decide to shoot with a gimbal. You will really need it while making videos, but many professionals use it even while taking still photos, as it allows you to rotate your camera smoothly.
Along with adding shake-free motion to your DSLR camera, your gimbal will facilitate a wide variety of motions, which is going to save a lot of your time and energy as well. Interestingly, these DSLR camera gimbals and stabilizers are quite lightweight, so it is easy to move them as you please, which in turn allows for comfortable handling and stabilization of your camera.
Setting the Focus Point
The focus point array is part of the lens system and determines the quality of your image. You can choose an off-center focus or straight focus depending on the position of your object. To set the correct focus point a pro technique is to use the lock focus option. Simply press the shutter button halfway down to lock the focus. You cannot use this lock focus technique for wider aperture size without blurred photographs.
Using the Correct AF Mode
There are normally two AF modes by default in all DSLR cameras. You can choose the desired mode according to the movement of your subject. If you are capturing a still image ‘One Shot’ mode is ideal with ‘Continuous’ mode best for capturing movement. This mode allows you to take multiple snaps of your object in series increasing the chance of capturing the desired image.
Using White Balance Settings
The white balancing feature of your camera balances the intensity of incoming light. Objects appear different in different colored lights and backgrounds. The white balance setting minimizes the effect of negative ambient lighting enabling you to take perfect shots. There are various white balancing options available including Auto, Daylight, Shade, Cloudy, Tungsten, Fluorescent and Flash. Each of these modes is designed for different light conditions and you can further adjust them according to customize the pictures to your own preferences. Playing with different lighting modes yields some amazing results.
Experimenting with Spatial Reality
Capturing distinctive and signature photographs never comes by following traditional techniques. It pays off to be experimental and explore ways of capturing perfect photos. Try being adventurous with where you position yourself for a shot in relationship to the subject. Bend down, lay on the ground, climb up high and be innovative as to where the photo is taken from to capture the shot that will amaze your audience. DSLR cameras can handle it.
Conclusion
Whether you end up with a preference for taking portraits or landscapes, still life or action shots, with a good DSLR camera helping you out with lighting, focus, and composition you’ll soon be discovering your talent for creating your own photographic masterpieces. When inspiration strikes for your next picture, you know there will be a mode for the right lighting and your focus point will be set to give every chance of creating stunning compositions complete with a wow factor that would make the likes of the great Michelangelo so very jealous.